White Willow Photography

The Best Photography Tips!

  • Home
  • Blog
  • About
  • Contact

Archives for June 2022

What Blinds Are Good For Photography?

June 30, 2022 by David

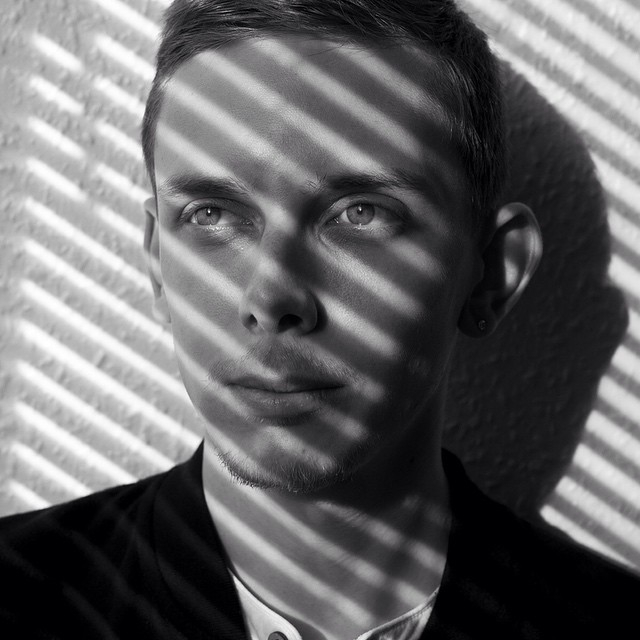
To achieve the perfect lighting for a portrait you should close your window blinds to the top. This creates a thin line that is perfect for moody and delicate portraits. While the lack of light can make finding the perfect pose difficult, it’s also ideal for accentuating certain features. To achieve a similar effect, you can instruct your model take a self-portrait even if the window blinds are closed.

Blackout cellular shades

If you love taking photographs and need to protect the equipment, you can buy a blackout cellular shade. These shades are custom-made to fit your windows. To ensure that you get the best fit, you should choose the inside mount width to be 1/4 – 3/8″ smaller than the actual window width. Add an additional width to your window for the outside mount. This will prevent any light leaking from the side of your window.

Cellular shades can be used just about anywhere, but they’re not a good idea for a kitchen or bathroom. They are able to absorb moisture and odors. They’re also not recommended for rooms where people smoke because they absorb these odors. Before purchasing cordless blackout shades for your home, it is a good idea to consult a professional. In addition, make sure to check the fabric care instructions carefully before purchasing.

Another important consideration for blackout cellular shades is their durability. A quality product that is made from strong materials will last for years. They can protect your camera against dust and other damage. Blackout cellular shades are a great choice for photographers because they block out the light. If you want to make good photos, they are great for taking pictures. These shades are also very energy-efficient. Aside from being comfortable and providing privacy, they also help to prevent glare in your photos.

Cellular shades from BlindsAvenue are made from spun lace non-woven fabric. They’re 100% polyester and are perfect for reducing harmful UV rays. These shades can also be adjusted to the desired room temperature. They’re also durable and are comfortable to touch. These shades are very economical and offer excellent insulation. The blinds are available in a wide range of colors and patterns.

Cellular shades are the best window coverings because they prevent the loss of energy from the house. Cellular shades also block dust, UV rays, noise, and light. They keep your room’s temperature steady. They can also be very pleasing to the eye. A photography studio can benefit from the dark colors of cellular shades. They create a calm atmosphere. And, with so many benefits, they’re worth every penny.

Zebra Sheer Dual Blackout Shades

If you need to control your light, but you don’t want to sacrifice privacy, a zebra sheer dual blackout shade may be your best option. The pattern of alternating stripes made from solid and sheer fabrics creates an interesting pattern that can be adjusted to blackout or filter light. Cord-free zebra shades are child-safe due to their light filtering fabric that lets in soft light. They are also great for photography because they diffuse light.

If you want to have a more private environment when photographing or taking pictures, a zebra sheer dual blackout shade will give you the privacy you need. This blind style is patent-pending and features alternating bands made of solid and translucent fabric. When the sheer material is raised, a cassette headrail conceals the transparent section, which allows you to see through it without blocking out light. The zebra sheer dual-blackout shades block light and diffuse evenly throughout the room. They also provide privacy.

What Blinds Are Good For Photography?

Zebra Sheer Dual Blackout Shades give you the freedom to control light while also maintaining privacy. The sheer fabric in the front of the shade rolls up into a cassette for easy operation, allowing you to control the amount of light entering and leaving the room. Dual sheer shades are versatile. You can use them for photography and to enhance the style of your room. They can be used in a wide range of rooms, and they are easy to install.

Zebra blinds sunscreen fabric is fire- and water-resistant. They are great for humid or flammable areas. They can also be customized to fit your interior design style. The zebra shades are available in nine color options and will complement both contemporary and traditional interiors. They can also block prying eyes with the blackout fabric. Zebra blinds are great for photography.

Top-down-bottom-up shades

If you want to control how much sunlight gets in your room while taking pictures, you should use Top Down Bottom-Up shades. These shades allow light in without compromising privacy. The bottom portion of the shade will cover everything from eye level. You want the shade to be solid and won’t move or shift if you take photos in your bedroom. The best way to get the perfect fit is to have a professional install them.

You can find top-down-bottom-up shades in many varieties. You can choose from cellular/honeycomb shades, pleated, Roman and sheer window shadings. They are available in a variety of fabrics, including natural and woven wood/grass. Top-down-bottom-up shades have narrow operating strings that will not interfere with your photos. They are useful for photography because they provide easy and flexible control of glare and can be opened or closed from any direction.

Motorization is another reason to choose top-down, bottom-up shades. The shades can be set to close while you’re watching TV. This way, you don’t have to worry about the shades wearing out or fading your rugs. Top-down-bottom up shades can also be used for other purposes, such as in your living area. You won’t miss a single photo by using this method.

They are also great for cordless top-down-bottom up shades. They eliminate dangling cords and replace them with tabs. These shades have a floating rail between the mounting rail and top section. This allows the shade’s top section to be lower when the tabs are moved. Top-down shades are stronger. A top-down bottom-up shade can be useful for taking photos or watching a movie.

Another reason top-down-bottom-up shades are useful for photography is that they can be adjusted to control the amount of sunlight. Too much sunlight can cause damage to your home furnishings and pictures. Your pictures might even appear darker than the rest of your walls. You will need to adjust the window shade to match the lighting conditions in the room. The best part? Cordless shades are available in many top-down-bottom up shades.

Vertical blinds with images

You can also purchase vertical blinds with images to add an artistic touch to your interior design. Vertical blinds with images for painting are exquisitely designed and made from the finest materials. Moreover, you can personalize them according to your tastes. Below are some tips to get the most out of your blinds. Just follow these steps and you’ll be well on your way to making your windows look beautiful. Remember to be creative!

Vertical blinds can be ordered in a variety of colors and styles to match your home. You have the option of PVC, faux wood, or wood. Wooden vertical blinds are the best for photography because of their natural look and feel. They are beautiful and can be used as bedroom window treatments. You can customize them to fit any size window, no matter how small or large.

You want a high-quality blind made from natural material. The best choice is 100% North American hardwood vertical blinds. They are however very expensive with prices starting at $70 to $225 per windows. Bamboo vertical blinds are cheaper, but they are still made of natural materials. Faux wood cellular shades can also be found. They imitate natural wood grain and resist fading. These blinds are also easy to clean and last for years.

In addition to wood, bamboo, and lace are all good choices for a photo background. Blinds also make the perfect backdrop for portraits. You can mount them on a light stand which allows for greater flexibility. To give them a different look, you can move them around on the stand. For a variety of backgrounds, you can attach photos to them. The possibilities are endless! Blinds can be used in a variety of ways.

What Blinds Are Good For Photography?

Photography Ideas in Nature

June 30, 2022 by David

When taking photos of people in nature, it’s important to make them stand out with clothing choices. People who are dressed in colors that contrast against their background will look more striking in a picture. For example, a red shirt against a blue sky will have more impact than one in which a white shirt is worn. Human subjects can also be popped up with complementary colors. This article will demonstrate how to do this.

Rule of Thirds

When photographing in nature, use the Rule of Thirds to balance the composition. Objects placed in the center of the frame are considered static and at rest. Similarly, you can place a secondary focus point on the diagonal opposite third of the photograph. These are just a few examples of ideas. You can see how the Rule of Thirds can be used to create a photograph.

For example, if you are photographing a waterfall, the horizon should align to the bottom horizontal grid line. The same principle applies to a mountain photograph in a landscape. The horizon should be at the center of a cityscape photograph. You can also use the Rule of Thirds to balance other elements of the scene. For instance, a landscape photo could show a mountain and boat in the center, and a hummingbird and flower in opposite corners. These elements make the photo balanced, and they are both similar shapes.

The Rule of Thirds can be used to place people in landscape photos. In this example, the woman holding an umbrella is in the lower third, while the water is on the right-hand side. The rules of thirds are equally applicable to objects and people placed in the background or foreground. Using the Rule of Thirds in nature photography is a good habit to cultivate. Check out our free online class to learn more about the Rule of Thirds.

A sunset over the river is one simple example of how to use the Rule of Thirds in photography. The sun is setting above the river, but the walls of the canyon create depth and keep the eye moving throughout the photo. Every photograph has a story to tell, and the Rule of Thirds is an excellent way to tell the story. You can use it to your advantage and make your photos more creative. If you want to capture the essence of nature, make sure your photos use the Rule of Thirds.

Golden hour

You have only two hours in the day to take photos, so it is critical that you plan your shots well in advance. If you want to make the most of these moments, you should scout out different locations beforehand, set your camera to the correct settings, and pack extras. In addition, you should pay close attention to the sky to anticipate where the sun will rise and set. By following these tips, you can capture the most amazing golden hour photography in nature.

Photography Ideas in Nature

By placing your subject in front of the bright light during the golden hour, it’s possible to create amazing silhouettes. You’ve likely seen the silhouette effect in movies. It’s no coincidence that golden hour light is the perfect time to use this effect. Not only does it create a dramatic silhouette, but it also helps balance out the warm colors and textures in the scene.

To capture the best golden hour light, try composing a scene that allows you to capture the light with a wide aperture. You may end up with a bright image that obscures the subject’s face if you shoot into the sun. To prevent this, position your subject in a place where the light is more diffused and maintain the highlights next to the subject’s head. To capture light from different angles, you can also change your angle.

Before heading out, do some research about the best times to shoot during the golden hour. The time of day determines when the golden hour falls. It is between sunrise and sunset. You should arrive at the spot an hour before sunset to take advantage of this moment. You should also plan ahead as the time of sunset and sunrise can affect the quality of your photos. To find the best time, you can use an app such as The Photographer’s Ephemeris.

Macro lenses

Macro lenses are great for taking photographs of insects, birds, and other small subjects in nature. They should be used with care. Getting close to the subject is crucial for good macro shots. It is best to photograph fast-moving subjects later in the day when the subject will be more still. The subjects will move slower once night falls. Photographing stationary subjects such as flowers and trees is a good way to start. As they improve their skills, they can begin to photograph insects and small animals.

It is important that macro shots are taken during the golden hour, just after sunrise and before sunset. These light effects create beautiful colors and interesting lighting effects. However, you will need to have a clear sky in order to capture them. Cloudy dim light will produce undesirable colors and jarring shadows. If you have to choose between the two, go with the latter. However, it’s still best to stick to the latter.

Canon EF 100mm f/2.8L macro lens is a wonderful example of a high-quality lens. Its image stabilization and three-position focus limiter to ensure reliable and fast autofocus. Canon also includes an innovative ring for controlling spherical aberration to improve the quality of out-of-focus elements. This lens is a great choice for photographers looking for a long, fast, and affordable macro lens.

You must also consider the depth-of-field when taking macro pictures. To achieve acceptable sharpness when focusing on objects close up, you will need to use a slow shutter speed with a high ISO. You will often need to use auxiliary lighting such as a ring flash. A tripod is also a great option. Autofocus is the best choice if you need to snap a quick shot.

Natural lighting

While the sun shines overhead, it is also possible to take beautiful photographs using natural light. Depending on the time of day, natural light can produce a soft or harsh effect, depending on the scene. Natural light is an artist’s best friend. It is important to learn its different forms and characteristics. Learn to use light from the surrounding environment to your advantage by taking photographs in different seasons. Listed below are some tips to take advantage of natural light in photography.

Planning natural light shoots is easier when you know where the Sun is at any given time. While you don’t have to plan each frame like a military operation, knowing the general direction of light is very important. The softer the light, the better. While you don’t have to plan every frame in detail, it is important to know the best time of day for the sun. Using the right combination of sunlight, shade, and cloud cover is crucial for taking great photographs of nature.

Different times of the day have different effects on the color of your photos. Sunny days have bright, direct light, while cloudy days are softer. Direct sunlight produces harsh shadows, but is highly effective when done right. If you want your photos to have an ethereal blue tint, choose a sunny day. Alternately, you can choose a time when it is low. Natural lighting is a great way to capture beautiful photos.

Natural lighting can be difficult. Because it can dramatically alter the appearance of a scene, it is important to consider the direction of natural lighting. You can use the direction of the light to your advantage, but it can also affect the subject’s silhouette. Choosing the right angle can make the difference between a flat, uninteresting photo and a picture with character. So choose your lighting technique wisely. And don’t forget to experiment!

Creating a photo book

A photobook in nature is an excellent way to showcase your nature photography if you are a nature lover. The combination of gorgeous photos and the power to create a sense of awe is priceless. You can use this format to share your work with friends and family, and it can also act as a portfolio for potential clients. While a low-cost photo book might not be worth the time and money spent on it, a high-quality professional book will be worth its weight in gold.

It is important to consider many aspects when creating a photobook. These include the type of paper used, the number of pages, and the size. The book’s size can have a significant impact on its longevity. If you’re creating a book for personal use, choose the highest-quality paper for the cover. You can choose the right size book for you. It doesn’t have to be too big or too small. Make sure you don’t choose too many or too few images.

The editing process was the longest part of creating a photo book. I spent many months selecting the best layouts and editing them. One tip I want to share is the golden ratio. This rule states that images should not exceed 60 percent in width and 40 percent in height. This ratio helps to create balance in the photobook. It also helps to avoid overcrowding. Keep things simple by placing a square image in the middle of the page. This will give you a sense of calm and harmony.

A photobook is a great way to share family memories. These books are a great way to commemorate special events and share stories with loved ones. These books can be used as a photo book for the family, a travel album, or a collection photos from your favorite places. They make great gifts for family and friends. You can make a photobook for any occasion, whether it’s a vacation or a birthday celebration.

Tips For Taking Photos After A Car Accident With Abogados de Accidentes Oxnard

June 27, 2022 by David

Tips For Taking Photos After A Car Accident

Taking photos after a car accident will help you keep evidence and get your damages back. Here are some tips on how to take photos following a car accident.

Preserving evidence after a car accident

There are several steps you can take in order to preserve evidence following a car crash. Collecting as many photographs of the accident scene as possible is the first step. Photographs should be taken at different angles and taken as soon after the accident as possible. These photos should be sharp and clear and should show the condition of the evidence as it was immediately after the accident. If you have a camera or a video recording device, make sure to take time stamps on the images. Also, ensure that you get film developed and preserved as soon as possible. These prints should be obtained from a photo shop that includes the date.

After a car accident, it is important to preserve all evidence, especially the vehicle. It doesn’t matter if the other driver was at fault, it’s important to preserve the vehicle as evidence. An expert in accident reconstruction may be needed to inspect and measure your vehicle. The evidence will help determine if seat belts were used, or if they were used in the accident. The evidence can also help you prove the liability of the other driver.

Photographs and videos can be invaluable evidence for the case. Videos, in addition to photographs, can provide valuable information about the injuries sustained. Photographs of the scene can be helpful for documenting damage to property and preserving physical evidence. The pictures should show details of the crash and the damage to the vehicles involved. It is important to keep bills and medical records in order to document any injuries. Photographs should show the correct lighting conditions, even though Polaroids are not ideal.

Tips For Taking Photos After A Car Accident With Abogados de Accidentes Oxnard

Recovering damages with photos

Photographs can be very helpful when filing a claim for damages after a car accident. Photographs of the accident scene should be taken, along with any visible injuries and weather conditions. Photograph the scene from several angles if possible to show how difficult it is to recover. You can get closer shots if you can. The more photos you have, the more accurate your claim will be and will definately help your friendly lawyer Abogados de Accidentes Oxnard to win your case.

Take photos of the damage to the scene. These photos can be used to show the extent and extent of your injuries as well as the damage to your vehicle. It is important to take photos soon after the accident. They should also indicate the date of the damage. Photos can show the location of the accident, such as skid marks or the speed at which vehicles were traveling before it happened. Panoramic shots of the scene are also helpful.

Photographs taken after an accident should be taken from a variety angles in order to show the extent of the damage. Take close-up photos of the damaged areas. You can also take photos showing the weather and the interior damage, as well as any injuries. Before tow trucks arrive to remove your vehicle, it is a good idea to take photos of the area. You’ll be happy you did.

Taking photos after a car accident

To show detail, you will need multiple shots of the same subject when taking photos after a car accident. You should also take photos of the car’s interior as well as the license plate to help determine the extent and location of the damage. Taking several photos is the best way to document the scene and establish its context. Here are some tips:

Take pictures of the scene and all vehicles involved. You should include details such as damage to license plates or skid marks, debris, and damage both vehicles sustained. Also, take photographs of any traffic signals such as stop signs or street lights. These photos can help determine who was responsible for the accident. Videos, in addition to photos, can be used by insurance companies to estimate the accident’s cost. A video can also show if the car accident was caused by a defective part of the road.

Photographs of the scene can be used to determine if the other driver was under the influence of alcohol or drugs. If so, photos can show if the other driver was speeding up or driving too fast for the conditions. The footage can be used as evidence in your insurance claim. If there are injuries, photos of the scene are crucial. They are essential in legal and insurance claims. Images can be used to make a compelling case.

Tips For Taking Photos After A Car Accident With Abogados de Accidentes Oxnard

Recent Posts

  • Photography 101 – The Essentials of Exposure, Focal Length, and Calotype
  • Tips for Taking Car Accident Scene Photos With Abogados de Accidentes San Bernardino
  • How to Take Pictures – The Art of Capturing Light With a Camera
  • The Basics of Photography
  • How to Raise Finance to Buy a New Camera With Tradeline Sales?

Recent Comments

No comments to show.

Archives

  • August 2022
  • July 2022
  • June 2022
  • April 2022

Categories

  • Blog

Menu

  • About
  • Contact
  • Privacy Policy

Copyright © 2023 · White Willow Photography